

Despite having written a post—just two days ago—on email marketing, you might realise that I’ve never actually created, let alone send out, newsletters before. It’s an uncharted territory for me. After blogging and running several social media accounts, I feel like I’ve got nothing more to say. They’ve all pretty much been said and done one too many times. So, when Campaign Monitor contacted me to do a collaboration, I wasn’t sure what to make of it. It sure feels exhilarating and intriguing, as it will be something new for me to try, but also at the same time confusing, because I don’t know what to make. Luckily, my birthday was just around the corner. And so, I decided to create a newsletter for my illustration store using that theme.
Before we start, let me give you quick info on the company: Campaign Monitor is a global email marketing company, consisting of three products—Campaign Monitor, Delivra and Emma. We’ve talked about Emma in the previous post too, if you remember. They already have locations in five major cities, spread out between three countries—the US, Australia and the UK. They offer numerous services, including email design, personalised customer experience, analytics and transactional emails. With their team being chocked full with experts and their support team running for 24/7, it’s no wonder that they have 99% customer satisfaction. They’ve had experience working with some of the world’s biggest brands, including Unicef, Rolling Stone and Penguin Random House. The best part about them is how much they care about giving back—volunteering is apparently really important to them. Not only in materials, but also in activities, such as picking up trash at the beach. I love me a company with good values!
Okay, so the first thing I did was create an account. It was simple enough, takes no time at all. Once I had an account, there were a few checklists that I should do—although you can skip them too—such as verifying email, connecting your subscription services, watching the tutorial video and creating a campaign. I must admit, my internet is probably not one of the fastest available—and at the time, it was going on and off and driving me crazy—so I was completely unable to watch the tutorial video. But it’s fine, even without the tutorial, I’d say the services they provide are pretty straightforward. Something else to note is you’d want to know two things before creating a campaign: 1) for what are you making the campaign and 2) what kind of campaign is it. Once that’s all done and dusted, I went ahead with the campaign creation.
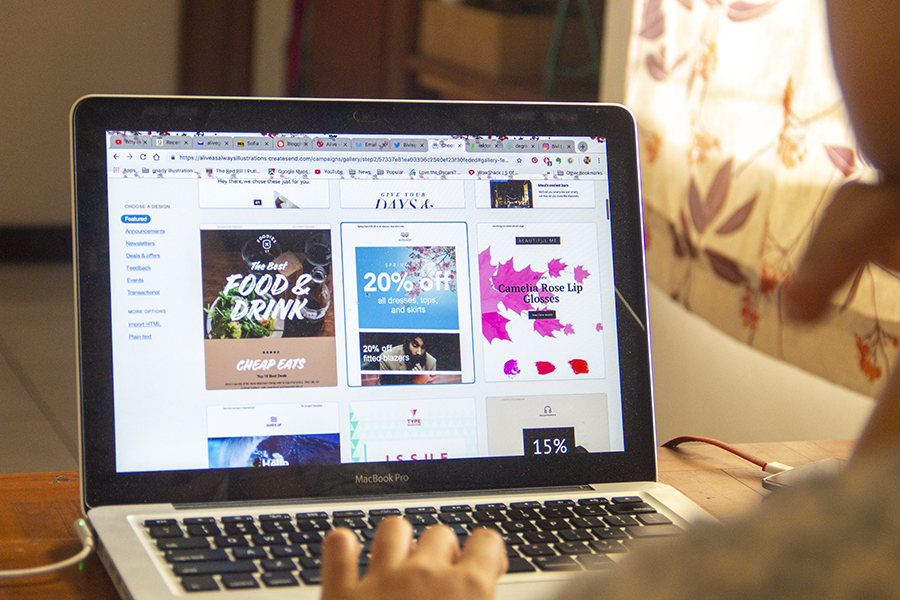
For the design of your email, you can choose from over 50 templates—or import your own HTML. They’re segmented into different functions, such as newsletter, events or deals & offer, so you can choose them according to what you want to send out. I chose one from the deals & offer category—unfortunately, the templates aren’t assigned names, so I can’t tell you which one. After that, I simply needed to replace the photos, edit the texts and rearrange the items until I am satisfied with the layout and content. It didn’t take too long. With all the assets ready to go, it probably takes under an hour to finish—especially if you know exactly what you want to say.
 |
This sale is real, by the way, so go check out my store! |
Once your email is finished, you need to add the email addresses of your recipients—and some additional info, if you like. They will ask you where you get the emails, the relationship you have with the recipients and the frequency of you exchanging emails with them. This is their way of taking care of our subscribers and making sure that we’re not just harassing a bunch of strangers—as a recipient of numerous random newsletters, this is something I strongly believe should be applied in other similar services. Afterwards, all you’ve got to do is wait for their approval and send out your emails. Piece of cake, no?
All in all, I’m really happy with the way my newsletter turns out. It’s pretty easy to edit and I can keep doing it until the email is sent. Also, Campaign Monitor allows me to send test emails to myself, so I know exactly what it looks like to the recipients—although their names will obviously not appear on mine. They also show me what the email will look like on mobile screens too, which is very helpful. In terms of pricing, they offer three packages too, depending on how many subscribers you have—so there are options for people with huge followings and for average Joes like me. If you ever feel the need to create a newsletter, I’d suggest you try out their services.

This post is brought to you by Campaign Monitor. It is the last of a two-part campaign. All opinions expressed are 100% my own.

Despite having written a post—just two days ago—on email marketing, you might realise that I’ve never actually created, let alone send out, newsletters before. It’s an uncharted territory for me. After blogging and running several social media accounts, I feel like I’ve got nothing more to say. They’ve all pretty much been said and done one too many times. So, when Campaign Monitor contacted me to do a collaboration, I wasn’t sure what to make of it. It sure feels exhilarating and intriguing, as it will be something new for me to try, but also at the same time confusing, because I don’t know what to make. Luckily, my birthday was just around the corner. And so, I decided to create a newsletter for my illustration store using that theme.
Before we start, let me give you quick info on the company: Campaign Monitor is a global email marketing company, consisting of three products—Campaign Monitor, Delivra and Emma. We’ve talked about Emma in the previous post too, if you remember. They already have locations in five major cities, spread out between three countries—the US, Australia and the UK. They offer numerous services, including email design, personalised customer experience, analytics and transactional emails. With their team being chocked full with experts and their support team running for 24/7, it’s no wonder that they have 99% customer satisfaction. They’ve had experience working with some of the world’s biggest brands, including Unicef, Rolling Stone and Penguin Random House. The best part about them is how much they care about giving back—volunteering is apparently really important to them. Not only in materials, but also in activities, such as picking up trash at the beach. I love me a company with good values!
Okay, so the first thing I did was create an account. It was simple enough, takes no time at all. Once I had an account, there were a few checklists that I should do—although you can skip them too—such as verifying email, connecting your subscription services, watching the tutorial video and creating a campaign. I must admit, my internet is probably not one of the fastest available—and at the time, it was going on and off and driving me crazy—so I was completely unable to watch the tutorial video. But it’s fine, even without the tutorial, I’d say the services they provide are pretty straightforward. Something else to note is you’d want to know two things before creating a campaign: 1) for what are you making the campaign and 2) what kind of campaign is it. Once that’s all done and dusted, I went ahead with the campaign creation.
For the design of your email, you can choose from over 50 templates—or import your own HTML. They’re segmented into different functions, such as newsletter, events or deals & offer, so you can choose them according to what you want to send out. I chose one from the deals & offer category—unfortunately, the templates aren’t assigned names, so I can’t tell you which one. After that, I simply needed to replace the photos, edit the texts and rearrange the items until I am satisfied with the layout and content. It didn’t take too long. With all the assets ready to go, it probably takes under an hour to finish—especially if you know exactly what you want to say.
|
This sale is real, by the way, so go check out my store! |
Once your email is finished, you need to add the email addresses of your recipients—and some additional info, if you like. They will ask you where you get the emails, the relationship you have with the recipients and the frequency of you exchanging emails with them. This is their way of taking care of our subscribers and making sure that we’re not just harassing a bunch of strangers—as a recipient of numerous random newsletters, this is something I strongly believe should be applied in other similar services. Afterwards, all you’ve got to do is wait for their approval and send out your emails. Piece of cake, no?
All in all, I’m really happy with the way my newsletter turns out. It’s pretty easy to edit and I can keep doing it until the email is sent. Also, Campaign Monitor allows me to send test emails to myself, so I know exactly what it looks like to the recipients—although their names will obviously not appear on mine. They also show me what the email will look like on mobile screens too, which is very helpful. In terms of pricing, they offer three packages too, depending on how many subscribers you have—so there are options for people with huge followings and for average Joes like me. If you ever feel the need to create a newsletter, I’d suggest you try out their services.
This post is brought to you by Campaign Monitor. It is the last of a two-part campaign. All opinions expressed are 100% my own.